Note: This design is intended to inspire ideas for those who are looking to build a display. This is NOT an engineered design and those who build anything do so at their own risk.
The Anderson
Difficulty: Easy-medium
The display we lovingly call the Anderson is named after its creator. The Anderson team designed this display to be able to fit into their car once broken down. Additionally, the display sets up and is taken down quickly, without major tools or fuss. Team Anderson painted it and made a very visually pleasing presentation.

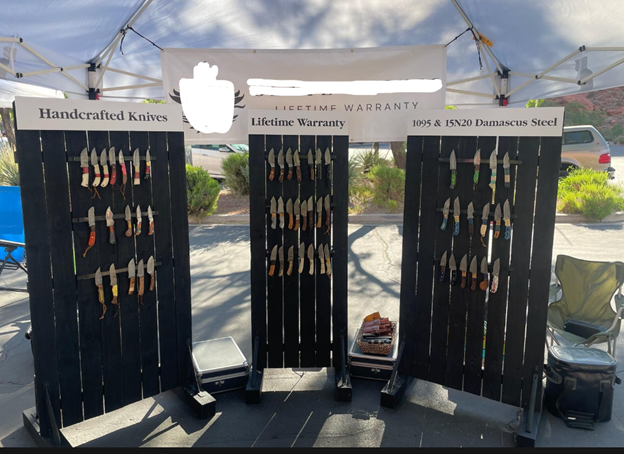
Materials list:
·
(5) 5/8” x 5 ½” X 6’ Cedar fence pickets –
display face 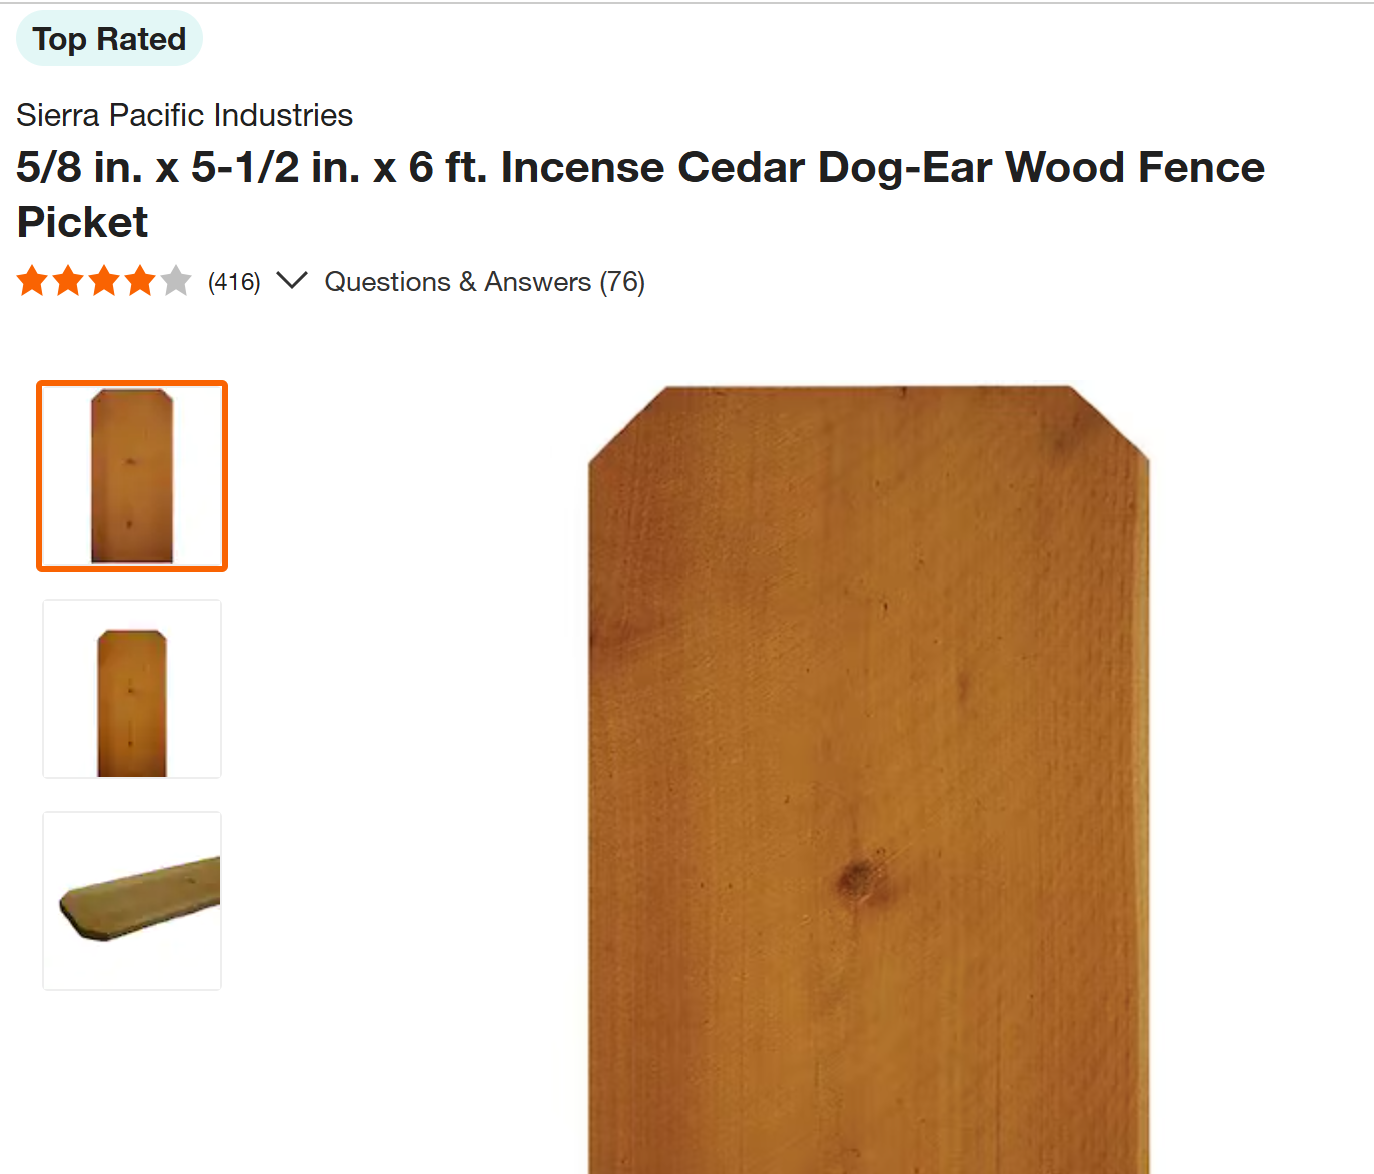
· (4) 2” x 4” x 33” lumber – cross members
· (2) 4” x 4” X 24-30” lumber - feet
· (1) 1” x 4” x 80” lumber – sheer support
· (4) 12” shelf support brackets
· Bar magnets
· Screws
· Paint
Directions:
1. Lay the cross member boards on a flat, even surface.
2. Mark each display face picket, starting at the bottom, at 4”, 24”, 44”, and 64”
3. Screw each of the display face pickets to the cross member boards, using the marks from step two to ensure a straight assembly. If space is desired between the pickets, use a small chunk of wood or other material to ensure all gaps are the same size.
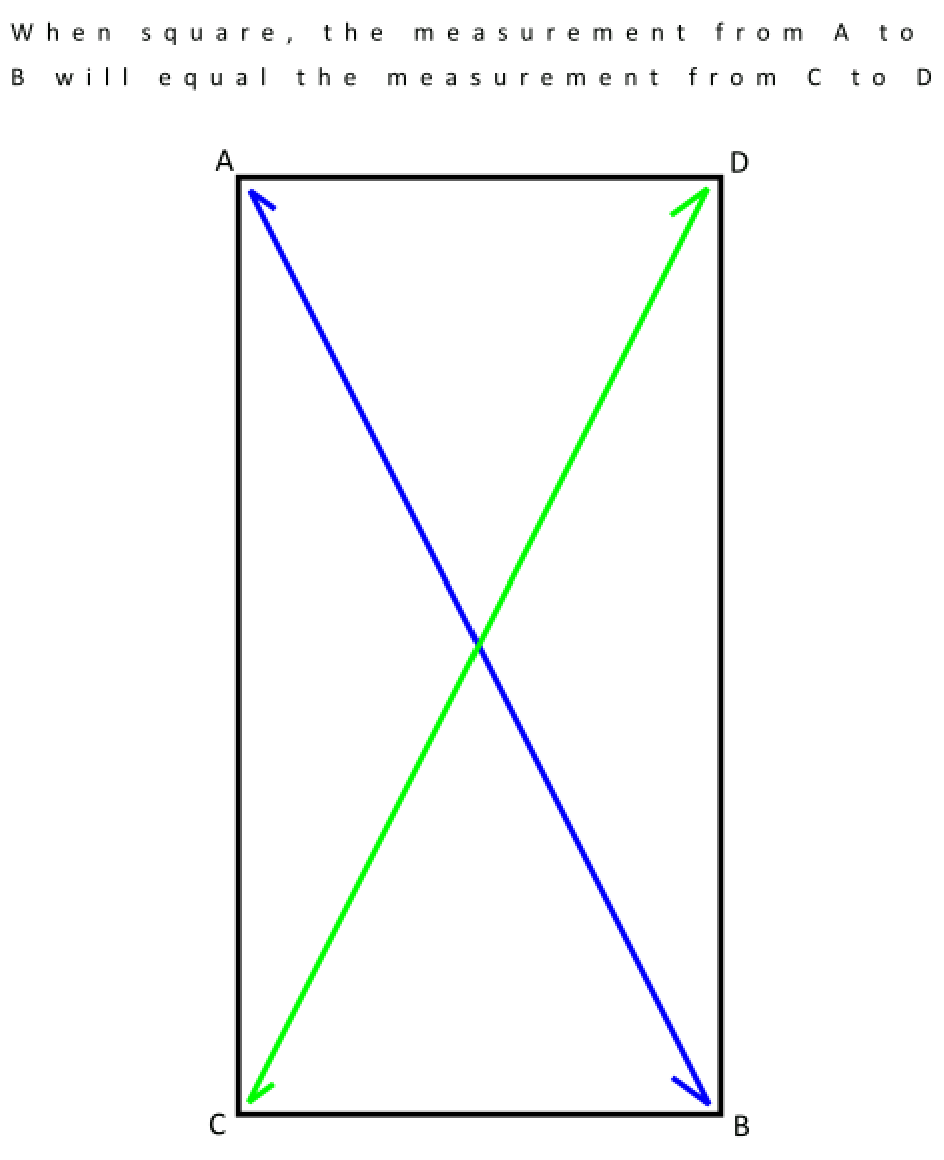
4. Flip the display over. Check for squareness by measuring from corner to corner. When the diagonal measurements are the same, the display is square. Use screws to attach the sheer support from one corner to the other diagonally (either a to b or c to d). Place two screws in each of the four cross members. Trim any edge which overhangs.
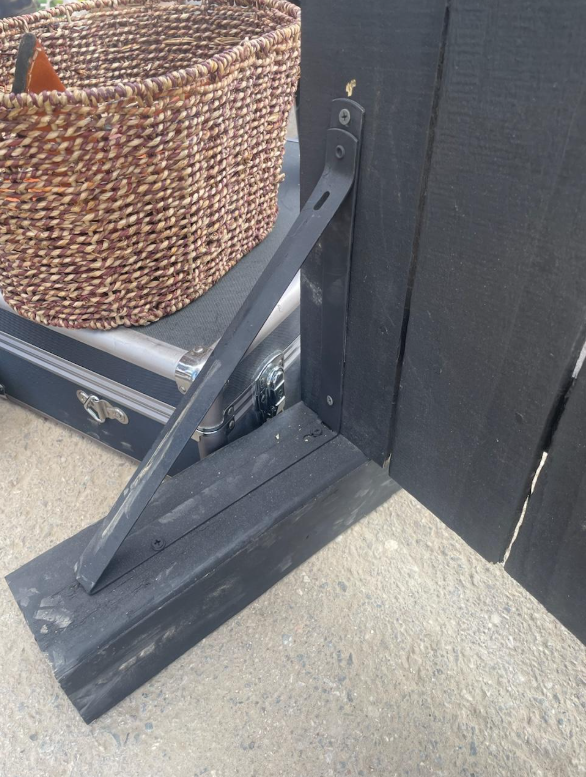
5. Flip the display over and attach two shelf support brackets to the bottom edge, inset one inch from the far right and the other one inset one inch from the left.
6. Stand the display up on the two ‘feet’ boards. Align the outside edge of the display face with the outside edge of the foot. Ensure the two sections are square to one another and secure the bracket to the foot with multiple screws. Repeat for the second front side.
7. Add the two remaining brackets to the back side of the display. Note: additional 2 x 4 blocking may be necessary for a solid connection.
8. Paint
9. Add bag magnets. (Harbor Freight)
Extra notes:
- To break down, simply remove the screws in the foot support brackets.
- adjustable feet may be added to the bottom of the 4 x 4 boards, making it easier to set up on uneven surfaces
- Use sandbags if there is any wind or possibility of the displays falling over.